PNGs for Screenshots
It is advisable to use PNGs for screenshots. PNG is a more appropriate format these days. Once upon a time, it was not well supported by browsers. However, this is long past.
Additionally, if we are talking screenshots (which might be large in size), it is wise to save them nicely compressed for the web. This is quite doable with photoshop and many other tools.
What this means is that by default graphics programs typically save images in a high quality. However for the web, this quality is unnecessary and only results in bigger files and slower downloads/page loads. For instance, a high quality image might be 200 kilobytes (or more). Web quality might be 40 kilobytes. An image if 1/5th the size means a 500% faster image download.
Photoshop Save As PNG Instructions
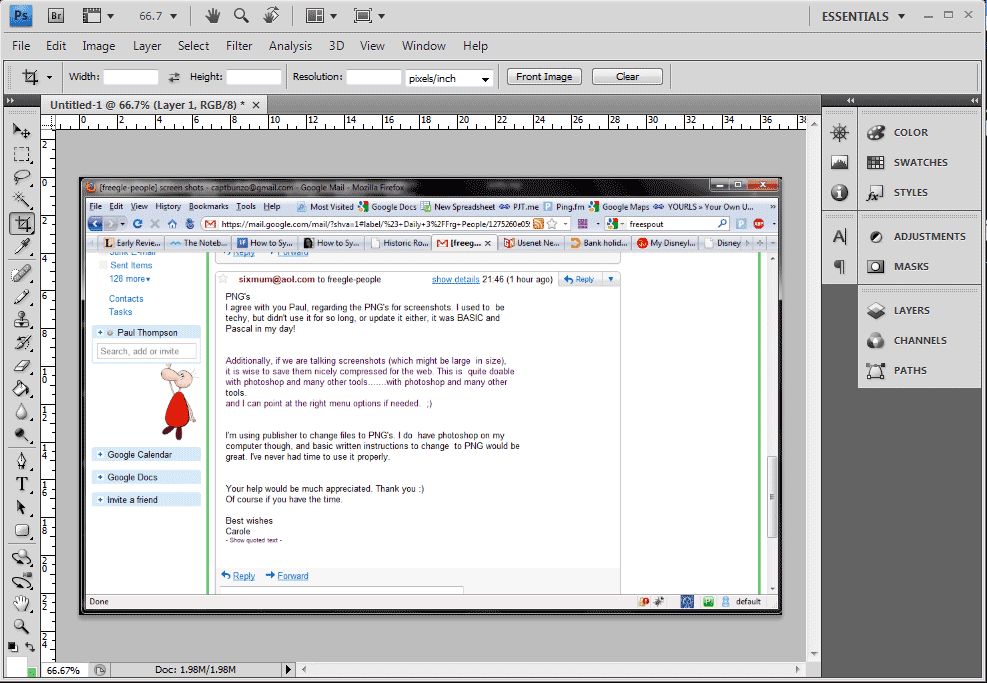
First, open the image in photoshop. You can also hit printscreen, then switch over to photoshop and do a File > New. By default Photoshop these days offers to create a new image sized on the clipboard. Once the new image is open, hit paste and then crop down. Continue as below.
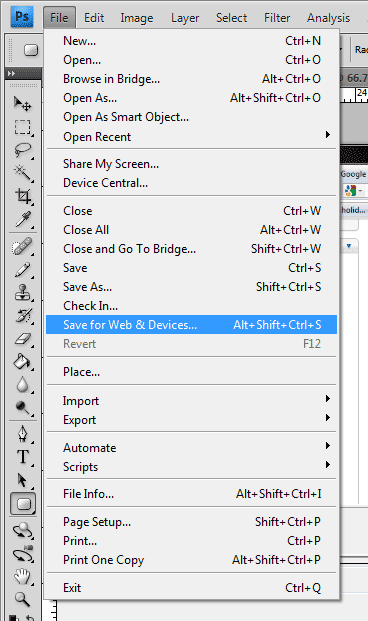
Next, Open File > Save for Web & Devices.
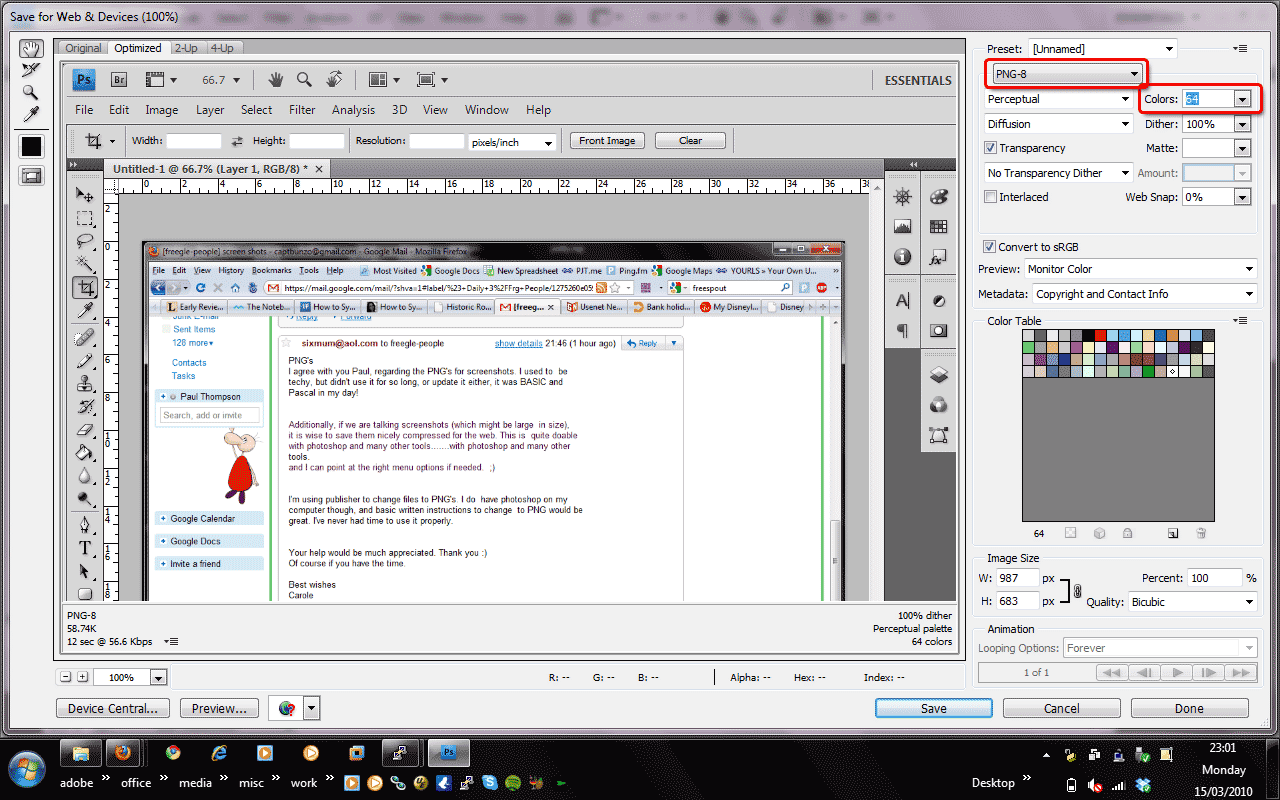
Finally, adjust options in this dialog. In particular I like to pick PNG-8 and then adjust the Colours. Watch both the file size in the lower left of the windows (58.74K in this example) and watch how changing different options effects the output image (the main windows shows how the image will look once compressed/saved. I often lower Colours until either image quality begins to suffer (then pop back up one level). Or sometimes lower Colours actually make the image bigger.
Good luck and happy photoshopping!
Link to Basic Screenshot instructions
Back to PR Materials


